How Does the Riverstone 6×8 Wooden Greenhouse Handle Early Spring Temperatures?
The Riverstone 6×8 Wooden Greenhouse is a compact, traditional-style timber structure designed for gardeners who want to extend their growing season without committing to a full-sized glasshouse. However, early spring planting brings the challenge of unpredictable frosts, cold soil, and fluctuating daytime temperatures. Without a deliberate heating strategy, even a well-built wooden greenhouse can lose heat rapidly overnight. The key to success with this model lies in combining passive insulation with a targeted, low-wattage heat source that matches the 6×8 foot footprint.
In this guide, we examine practical heating and insulation upgrades that make the Riverstone 6×8 viable for early March sowings and April transplants. We will cover everything from soil warming cables to thermal mass placement, with specific recommendations for UK gardeners working within the typical 5°C to 12°C nighttime lows of early spring.
What Is the Best Heating Method for a 6×8 Timber Greenhouse?
Electric heating remains the most controllable and safest option for a wooden greenhouse of this size. Paraffin heaters produce moisture and carbon dioxide, which can damage the wooden frame over time, while gas heaters require ventilation that defeats the insulation. For the Riverstone 6×8, a 1.5 kW electric fan heater with a built-in thermostat is a practical starting point. However, because this greenhouse has a relatively small volume (roughly 14 cubic metres), a 1 kW unit may suffice if the greenhouse is properly insulated.
Recommended setup for early spring: Install a thermostatically controlled fan heater rated at 1.5 kW. Set the thermostat to 5°C for frost protection, or 10°C if you are growing tender seedlings like tomatoes or peppers. The heater should be placed on a fireproof pad at least 30 cm from any wood surface. A 2.5 mm² armoured cable from a dedicated RCD-protected outdoor socket is the safest electrical supply.
Alternative Low-Cost Options
If you prefer not to run mains electricity, consider a 400 W soil warming cable buried 10 cm deep in the staging or in raised beds inside the greenhouse. This directly heats the root zone rather than the air, using roughly one-third the energy of a fan heater. For air frost protection, a pair of 200 W tubular heaters placed along the base of the side walls can maintain 2°C to 3°C above outside temperature. However, these are less effective when outdoor temperatures drop below -2°C.
For a detailed comparison of heating costs, see the table below.
| Heating Method | Power Draw (W) | Cost per 8-hour night (£) | Frost Protection (down to °C) | Install Difficulty |
|---|---|---|---|---|
| 1.5 kW Fan Heater (thermostat at 5°C) | 1,500 W | £1.92 | -6°C | Medium (needs outdoor RCD socket) |
| 400 W Soil Warming Cable | 400 W | £0.51 | Not for air – protects root zone only | Easy (bury in soil) |
| Two 200 W Tubular Heaters | 400 W total | £0.51 | -2°C | Easy (wall-mounted) |
| Paraffin Heater (medium) | N/A (fuel) | ~£1.10 per night (fuel) | -3°C | Easy but risky for wood moisture |
Costs based on UK electricity rate of £0.24 per kWh (April 2025). Paraffin cost estimated at £1.20 per litre, with heater consuming ~0.9 litres per night.
Which Insulation Upgrades Work Best for the Riverstone 6×8 Frame?
The Riverstone 6×8 uses 3 mm horticultural glass held in wooden glazing bars. While the timber frame offers reasonable thermal mass, single glazing is the primary heat loss area. The most effective insulation upgrade is to install a layer of 0.2 mm bubble wrap horticultural insulation on the inside of all glazed panels. This reduces heat loss by up to 30% and also helps retain humidity.
Installation tip: Cut the bubble wrap to each pane size, then fix it using greenhouse clip clamps or magnetic strips. Avoid tape on the wooden frames, as it can trap moisture and promote rot. Leave a 2 cm gap at the top and bottom of each pane for condensation drainage.
Another high-impact upgrade is floor insulation. The Riverstone 8×6 typically sits on a concrete slab or compacted gravel base. If your base is concrete, lay a sheet of 50 mm extruded polystyrene (XPS) foam board directly on the floor, then top with a moisture-resistant plywood sheet. This prevents cold bridging through the ground, which can lower floor-level temperatures by 3°C to 5°C compared to air temperature.
Thermal Mass Placement
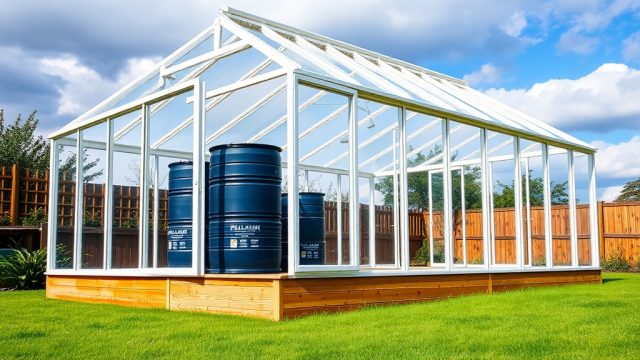
Inside the greenhouse, place several 20-litre water containers painted black along the north wall. These act as passive thermal mass, absorbing daytime solar heat and releasing it slowly during the night. On a sunny March day, four such containers can raise overnight temperatures by 1.5°C to 2°C. This is often enough to prevent a light frost from damaging hardy seedlings like lettuce or brassicas.
For more on preserving the timber structure during these modifications, read our seasonal maintenance checklist for wood preservation.
How Do You Prevent Heat Loss Through Gaps and Joints?
Even a well-assembled Riverstone 6×8 can have small gaps between the wooden frame and the glass panels, especially after the timber settles over the first winter. These gaps are responsible for up to 20% of total heat loss. The solution is to apply a bead of clear silicone sealant or use weatherproof draught excluder tape around each glazing channel. Check the door seal as well; a simple rubber brush strip fitted to the bottom of the door can stop cold air from entering at ground level.
Ventilation balance: While sealing gaps is essential for heating, you must still maintain controlled ventilation to prevent fungal diseases. The Riverstone 6×8 comes with one roof vent and one side louvre vent. For early spring, open the roof vent during the warmest part of the day (11 AM to 2 PM) to release excess humidity, then close it by 3 PM to trap daytime heat. Leaving vents open overnight in March can drop interior temperature by 4°C to 6°C.
If you struggle with condensation or humidity control alongside heating, our guide on ventilation tips for humidity control provides a complete strategy for balancing warmth and air movement.
What Is the Ideal Soil Temperature for Early Spring Seedlings?
Many early spring failures are not due to cold air, but cold soil. For seeds to germinate reliably, soil temperature must reach at least 8°C for hardy vegetables like peas and spinach, and 15°C for tender crops like courgettes and basil. In an unheated 6×8 greenhouse, soil temperature in March typically lags behind air temperature by 5°C to 8°C. This is where targeted soil warming becomes essential.
Using a 400 W soil warming cable buried 10 cm deep in a raised bed or seed tray provides consistent bottom heat. Alternatively, electric propagation mats placed under seed trays on the staging can raise the grow-medium temperature by 6°C to 10°C above ambient air. For a 6×8 greenhouse, one 60 cm x 90 cm propagation mat running at 150 W is sufficient for a standard staging area.
Recommended Practices for Seedling Success
- Start seeds in a heated propagator on the staging; do not direct-sow into cold soil until late April.
- Use a digital soil thermometer to check temperature at seed depth daily.
- Water with tepid water (18°C to 20°C) to avoid shocking the roots.
- If using a fan heater, direct the airflow away from seedlings to prevent drying.
For more on how to optimise your greenhouse interior for multiple trays, see our DIY custom shelving plans for small greenhouses.
How Can You Reduce Heating Costs Without Sacrificing Plant Health?
Heating a 6×8 wooden greenhouse can cost £30 to £50 per month if running a fan heater 10 hours per night. To reduce this, consider these strategies that work specifically with the Riverstone 8×6 design:
- Zone heating: Use a propagation mat or soil cable to heat only the seed tray area, rather than the entire air volume. This can cut energy use by 60% while still providing the warmth needed for germination.
- Thermal curtains: Install a thick drape (thermal fleece or old duvet) along the north, east, and west walls at night. This reduces the heated air volume and traps warmth near the plants.
- Heating timer: Set the heater to run only between 10 PM and 6 AM, when outdoor temperatures are lowest. A programmable thermostat can maintain 6°C during those hours and allow the greenhouse to cool to 2°C during the day.
- Biodegradable heating: Fill two large buckets with fresh horse manure or compost. As the material decomposes, it releases heat (up to 50°C in the core). Place buckets near the plants; the gentle heat is free and the compost is ready for the garden by summer.
The combination of passive thermal mass and targeted electric heating can reduce your total energy bill by 40% compared to simply running a fan heater all night.
For many gardeners, improving the greenhouse base is the first step. Our ground preparation tips for first-time builders offers a complete foundation guide that directly impacts heating efficiency.
What Owners Say About Heating the Riverstone 6×8
Feedback from UK owners of the Riverstone 6×8 Wooden Greenhouse consistently highlights two points: the structure is draughty until properly sealed, and the heating solutions that work best are those that address the floor and glazing first.
Lisa from Devon reports: “I used a 1 kW oil-filled radiator on a thermostat set at 7°C. I also lined the floor with 25mm polystyrene under a rubber mat. My early March lettuce and kale were ready six weeks earlier than the outdoor ones. The electricity cost averaged about £1.20 per mild night.”
Mark from Cumbria took a different approach: “I installed a soil warming cable in a raised bed inside the greenhouse. I only heat the soil, not the air. I grew carrots and beetroot from mid-March without any frost damage. The total cost was £50 for the cable and thermostat, and my electricity bill barely changed.”
Caroline from Somerset combined insulation with automatic shading: “I fitted bubble wrap to the glass and also installed the automatic shade system. The combination kept the daytime temperature from overheating while still retaining warmth at night. I was able to start my tomatoes in early April without supplemental heat.” For a step-by-step guide, see how to install an automatic shade system for heat control.
Most owners agree that investing in a proper base and sealing the glazing are non-negotiable for successful early spring heating. With those in place, a combination of soil warming and a small fan heater is sufficient for frost-free growing from mid-March onward.
Frequently Asked Questions
Can I use a propane heater inside the Riverstone 6×8?
Propane heaters produce carbon dioxide, which benefits plants, but they also produce large amounts of water vapour. This moisture can accelerate rot in the wooden frame and cause condensation damage to seedlings. If you must use propane, ensure the greenhouse has a vent open at all times and place the heater on a concrete block away from wood. Electric heating is strongly recommended for timber greenhouses.
What temperature should I set my thermostat for frost protection?
For mild frost protection (down to -3°C outside), set the thermostat to 3°C. For tender seedlings, set it to 7°C. Avoid setting it above 10°C unless you are growing tropical species, as this will significantly increase electricity costs without additional plant benefit.
Do I need to insulate the brick base of the greenhouse?
Yes, the brick or concrete base is a major heat sink. Line the interior of the base with 25 mm XPS foam board, cut to fit tightly. Cover the foam with a waterproof membrane or plywood to protect it from moisture. This can raise the floor-level temperature by 2°C to 3°C.
How long does bubble wrap insulation last in a wooden greenhouse?
High-quality horticultural bubble wrap typically lasts one to two seasons before UV degradation makes it brittle. Replace it every spring for optimal performance. Remove it during summer to allow full light transmission and to prevent heat buildup.
Will a small electric heater damage the wooden frame?
As long as the heater is placed on a non-flammable surface (stone, metal, or ceramic tile) and at least 30 cm from any wooden surface, it will not damage the frame. Avoid directing the airflow directly at the timber, as rapid drying can cause cracking. Use a heater with a built-in tip-over switch for safety.
Can I use the Riverstone 6×8 for year-round growing with heating?
Yes, with sufficient insulation and a 1.5 to 2 kW heater, you can maintain temperatures above 5°C even in a UK winter. However, the cost can range from £60 to £100 per month during December and January. Many gardeners switch to cold-season crops or use the greenhouse as a winter storage and potting area during the darkest months. Consider bench and planter combo ideas for space saving to maximise your usable area.