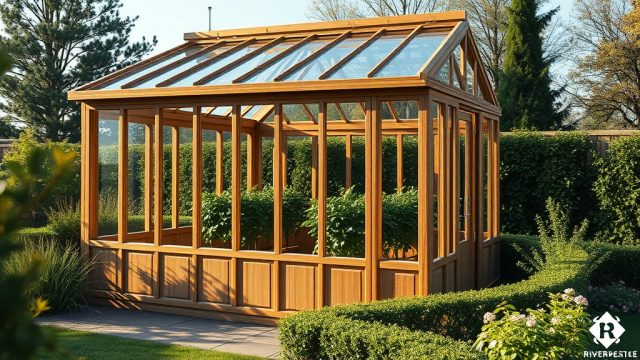
What Makes the Riverstone 6×8 Wooden Greenhouse Prone to Rot?
The Riverstone 6×8 Wooden Greenhouse is a popular choice for UK gardeners seeking a compact, traditional structure for year-round growing. Its cedar and spruce construction offers natural charm and good insulation, but the wood panels are exposed to constant moisture from rain, condensation, and soil splash. Over two or three years, untreated wood can develop rot, especially at ground level and around door frames. Replacing rotten panels is a manageable DIY task that restores the greenhouse’s integrity and extends its life. This guide walks you through each step, from assessment to finishing, ensuring your Riverstone 6×8 remains a productive growing space.
How Do I Identify Rotten Wood Panels on My Riverstone 6×8?
Before starting any replacement, conduct a thorough inspection. Rotten wood often feels soft, crumbly, or spongy when pressed with a screwdriver. Look for discolouration—dark brown or black patches—and fungal growth like mushrooms or mould. Pay special attention to the bottom 30 cm of each panel where moisture collects. Tap the wood with a handle; a hollow sound indicates internal decay. Check all joints and corner brackets; rot here compromises the whole structure. For a full seasonal check, see our Riverstone 6×8 Wooden Greenhouse: Seasonal Maintenance Checklist for Wood Preservation.
- Use a screwdriver to probe suspect areas; if it sinks in easily, the wood is rotten.
- Smell for a musty, earthy odour—a sign of wet rot.
- Check ventilation louvers and window frames—often overlooked spots.
- Examine the timber preservative layer; flaking or missing varnish increases risk.
What Materials and Tools Do I Need for Panel Replacement?
Gather everything before starting to avoid delays. For a Riverstone 6×8, panels typically measure 1200 mm x 800 mm x 12 mm, but confirm your model year. You’ll need untreated cedar or spruce replacement boards, exterior-grade wood preservative, galvanised screws (4×30 mm), a jigsaw or circular saw, a drill, a chisel, a rubber mallet, and waterproof glue. Budget around £45–£65 for wood and preservative if one panel needs replacing. For multiple panels, costs rise to £120–£180. Always buy preservative matched to your greenhouse’s original treatment—solvent-based for older sheds, water-based for newer ones. If you’re planning to upgrade shelving during the repair, check our Riverstone 6×8 Wooden Greenhouse: DIY Custom Shelving Plans for Small Greenhouses.
| Tool | Purpose | Approximate Cost (£) |
|---|---|---|
| Jigsaw | Cutting rotten panel sections cleanly | £25–£50 (hire cheaper) |
| Drill with bits | Removing screws and pilot holes | £15–£40 |
| Chisel set | Removing stubborn wood pieces | £8–£15 |
| Rubber mallet | Seating new panel without damage | £6–£12 |
| Replacement cedar panel (1200x800mm) | Main material | £18–£30 each |
| Wood preservative (1L) | Sealing new wood | £10–£18 |
| Galvanised screws (pack of 100) | Securing panel | £5–£8 |
How Do I Remove a Rotten Wood Panel Without Damaging the Frame?
Safety first: wear gloves and safety glasses. Start by removing any glass or polycarbonate sheets covering the panel. For the Riverstone 6×8, panels are usually fixed with screws through the frame into the panel edges. Use a drill to back out all screws—don’t try to pry the panel off while screws remain. If screws are seized, apply penetrating oil (e.g., WD-40) and wait 10 minutes. Gently tap a chisel between the panel and frame at the bottom corner, then work upward. If the panel is glued, use a pry bar carefully against the frame. Dismantle the panel into two or three pieces if it’s large—this reduces risk of splitting adjacent wood. Mark each piece’s position with tape to avoid confusion when fitting the replacement. Proper removal is key to preserving the structural integrity of the greenhouse, especially if you plan to later add Riverstone 6×8 Wooden Greenhouse: Bench and Planter Combo Ideas for Space Saving.
What’s the Correct Way to Cut and Fit a New Replacement Panel?
Measure the opening carefully: width and height at both top and bottom—frames may not be perfectly square. Transfer measurements to your replacement board, allowing 2 mm gap for wood expansion. Use a jigsaw with a fine-tooth blade for clean cuts. Drill pilot holes through the new panel at the same positions as the original screws—use the old panel as a template if possible. Apply a bead of waterproof glue along the frame edges where the panel will sit. Insert the panel from inside the greenhouse, pushing it firmly against the frame. Align pilot holes with frame screw positions. Use a rubber mallet to gently tap the panel flush—never hammer directly. Secure with galvanised screws, driving them flush but not countersunk too deep—over-tightening can crack the wood. Wipe off any excess glue immediately.
Key Fitment Steps
- Measure opening diagonally to check it’s square; adjust if needed by shimming.
- Pre-drill holes every 200 mm along each side.
- Use stainless steel screws for areas near vents or doors—more corrosion resistant.
- If the frame is damp, let it dry 24 hours before gluing and screwing.
How Should I Treat and Seal the New Panel for Long-Term Protection?
Treating new wood is essential to match the preservative on existing panels. Apply a high-quality outdoor wood preservative with UV protection—cedar and spruce are naturally semi-durable but need annual top-ups. Brush on two coats, focusing on end grains which absorb most moisture. Use a solvent-based preservative for best penetration (allow 48 hours drying). For a more eco-friendly option, water-based acrylic treatments are effective but need annual reapplication. Let the first coat dry completely (6–12 hours) before sanding lightly with fine-grit paper, then apply the second coat. For bottom panels, add a 50 mm wide strip of bitumen flashing tape along the base joint to block water wicking. This extra measure can double lifespan in damp UK climates. For winter preparation, refer to our Riverstone 6×8 Wooden Greenhouse: Heating Solutions for Early Spring Planting for protecting the structure from condensation.
What Owners Say About Replacing Panels on the Riverstone 6×8
Owner reviews on UK gardening forums highlight that the Riverstone 6×8’s panel replacement is “far simpler than expected” for a wooden greenhouse. Many note that the structure’s modular design allows single-panel swaps without full disassembly. A common tip from owners: “Replace the panel with pressure-treated timber rather than untreated spruce—costs £8 more but lasts 5 years longer.” Others recommend keeping spare screws from the original kit, as standard 4×30 mm fit perfectly. Some users report that lower panels rot within 18 months if gutters are missing; installing a DIY rainwater system dramatically reduces damp. For that upgrade, see our Riverstone 6×8 Wooden Greenhouse: DIY Rainwater Collection System for Efficiency. One experienced owner advises: “Don’t over-tighten screws when fitting the new panel—wood shrinks in summer and can crack.” Overall, owners agree that a proactive approach—replacing panels at first sign of rot—saves the greenhouse from structural failure.
Frequently Asked Questions
Can I use plywood instead of cedar for replacement panels?
Yes, but exterior-grade plywood (marine or WBP) can be used as a cheaper alternative. However, plywood edges soak up moisture quickly, so seal all cut edges with multiple coats of preservative. Cedar or spruce match the original aesthetic better and have consistent expansion rates.
How often should I check for rot in my Riverstone 6×8 greenhouse?
Inspect monthly during the growing season (April to October) and every two months in winter. Focus on the bottom 30 cm and corners. Early detection allows panel replacement without frame damage.
Will replacing one panel affect the greenhouse’s warranty?
Most warranties cover initial defects but not rot from poor maintenance. Replacing with equivalent timber using recommended methods is fine. Check your supplier’s policy—some require use of branded timber preservative to keep warranty valid.
What’s the best preservative to use after replacement?
For the Riverstone 6×8, use a solvent-based wood preservative with fungicide. Brands like Cuprinol 5 Star or Ronseal Ultimate Protection are widely used. Apply two coats, letting each dry thoroughly. For ecological preference, water-based treatments are acceptable but need annual reapplication.
How long does it take to replace one panel?
Typically 3–5 hours including drying time for preservative. Actual hands-on work: 1.5–2 hours. Plan the job over two days if you want full preservative curing (48 hours) before moving plants back in.
Can I paint the new panel to match the original wooden greenhouse colour?
Yes, but only after the preservative has fully dried (at least 24 hours). Use exterior wood paint matching the original shade—consult the manufacturer’s colour guide. Lightly sand the preserved surface before painting for adhesion.