Why Is Automatic Drip Irrigation Essential for the Palram Canopia Harmony 6×8?
Owning a Palram Canopia Harmony 6×8 greenhouse is an investment in year-round growing, but the real magic happens when you automate the watering. Manual watering is inconsistent, wastes water, and requires daily attention—especially during hot spells. An automatic drip irrigation system tailored to this 6×8 structure delivers precise moisture to each plant’s root zone, reducing water usage by up to 50% while boosting crop yields. More than a convenience, it’s a strategic upgrade that frees you to focus on other garden tasks and ensures every seedling gets the hydration it needs.
In this guide, we’ll walk through the setup, component selection, and measurable benefits of a drip system for the Harmony 6×8. Whether you’re growing tomatoes, peppers, or delicate herbs, automation transforms your greenhouse into a self-regulating ecosystem. For more on keeping your greenhouse climate-optimized, see our guide on Palram Canopia Harmony 6×8: Automatic Roof Vent Opener Installation and Benefits.
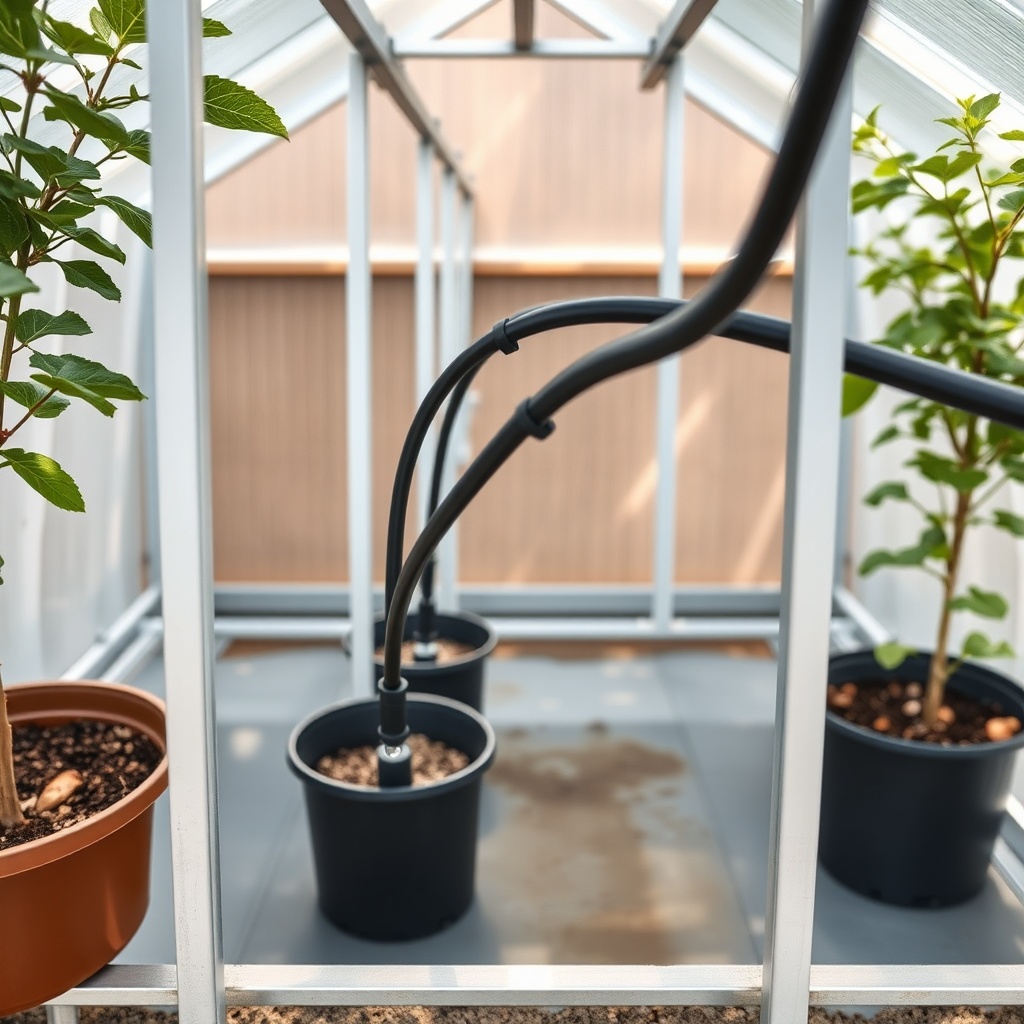
What Components Do I Need for a Drip Irrigation Setup?
Building a reliable drip system for the Harmony 6×8 requires selecting components that match its 6×8-foot footprint—roughly 48 square feet of growing space. Here’s a practical list:
- Water source connection: A garden hose or rainwater barrel with a brass or plastic adapter. For best results, use a backflow preventer to keep contaminants out of your main supply.
- Timer/controller: Battery-operated or mains-powered. Look for models with at least two zones and a rain-delay feature. A basic digital timer costs around £25–£40 in the UK or €30–€50 in Europe.
- Pressure regulator: Most drip systems operate best at 15–25 PSI. A simple regulator (≈£12) prevents bursting lines and ensures even drip spacing.
- Mainline tubing: ½-inch (13 mm) polyethylene tubing for the header line. You’ll need about 20 feet to run the length of the greenhouse and connect to all rows.
- Drip tubing or emitter lines: ¼-inch (6 mm) micro-tubing with pre-installed drippers every 6–12 inches. For a 6×8, plan on 40–50 feet of micro-tubing for three to four rows.
- Fittings and end caps: Elbows, tees, coupling, and a flush cap to clean the system. A simple tool kit (punch, scissors, connector tool) is helpful.
- Filter: A 150-mesh or finer filter (≈£8) keeps debris out of the narrow emitter pathways.
- Drip stakes and holders: To keep tubing secure and emitters off the soil.
Total component cost for a basic automated setup runs about £70–£110 (€80–€130) depending on brand and controller complexity. For a more advanced system with sensors, see Palram Canopia Harmony 6×8: Automatic Irrigation System Setup and Benefits.
How Do I Install the Drip Irrigation System Step by Step?
Installation is straightforward and can be completed in an afternoon. Follow these steps for a leak-free, efficient system in your Harmony 6×8:
- Plan layout: Sketch your plant layout inside the 6×8 footprint. Typically, you’ll run three to four rows of crops lengthwise (8-foot direction). Each row gets a dedicated drip line.
- Attach the timer and backflow preventer: Connect the timer to your outdoor faucet, then attach the backflow preventer and pressure regulator. Many gardeners mount the timer on a wall bracket inside the greenhouse for easy access.
- Run the mainline tubing: Lay the ½-inch tubing along one side of the greenhouse, securing it with ground staples. Use a punch to create holes where each row will branch off.
- Install drip lines: Connect ¼-inch micro-tubing from the mainline to the start of each row. Place drip stakes every 12–18 inches to anchor the lines. Use T-connectors if you want to loop back for even pressure.
- Add emitters or drip tape: For individual pots, use adjustable drippers (1–4 GPH). For in-ground beds, drip tape with 8-inch emitter spacing works well. Check manufacturer flow rates to avoid over- or under-watering.
- Install the flush cap and filter: Place a flush cap at the end of each drip line so you can clean out sediment. The filter should be between the timer and mainline.
- Test and adjust programming: Run the system manually to check for leaks. Then program the timer: for most crops, 15–30 minutes once or twice daily in warm weather. Use a rain sensor to skip unnecessary cycles.
For best results, integrate this setup with your greenhouse climate control. The Harmony 6×8’s polycarbonate panels affect humidity—read about managing condensation in Palram Canopia Harmony 6×8: Insulation Properties of Polycarbonate Panels.
What Are the Measurable Benefits of Drip Irrigation in the Harmony 6×8?
Automatic drip irrigation transforms how you manage water and plant health inside the Harmony 6×8. Key benefits include:
- Water savings: Drip systems use 30–50% less water than overhead watering. For a 6×8 greenhouse, daily watering can drop from 15–20 litres to 8–10 litres, saving up to 360 litres a month in peak summer.
- Reduced disease risk: By keeping foliage dry, drip irrigation prevents fungal diseases like powdery mildew and botrytis, which thrive in humid leaf environments.
- Consistent growth: Uniform moisture delivery eliminates wet/dry cycles that stress plants. Tomatoes, for example, show 20% fewer blossom-end rot incidents with steady drip watering.
- Time savings: You eliminate the need to hand-water daily—saving 30–60 minutes per day during summer. That adds up to over 30 hours a month you can spend on pruning, pest control, or harvest.
- Nutrient efficiency: You can inject liquid fertilizer (fertigation) through the drip lines, reducing fertilizer use by 40% because it goes directly to the roots.
- Adaptability: The system can be expanded with separate zones for seedlings (shorter cycles) vs. mature plants (deeper watering).
These benefits are amplified when combined with proper glazing maintenance. For tips on keeping panels clear and sealing leaks, refer to Palram Canopia Harmony 6×8: Troubleshooting Common Glazing Issues.
How Does Drip Irrigation Compare to Manual Watering in This Greenhouse?
To quantify the differences, here’s a comparative table based on a 6×8 greenhouse with typical mixed vegetable crops (tomatoes, cucumbers, lettuce) over a 30-day summer period:
| Metric | Manual Watering (Hose/Can) | Automatic Drip Irrigation |
|---|---|---|
| Daily water usage | 15–20 litres | 8–10 litres (saves 50%) |
| Time spent per day | 45–60 minutes | 0 minutes (after setup) |
| Consistency of moisture | Uneven (dry/wet cycles) | Even (±2% moisture variance) |
| Foliar disease incidence | Moderate (15–25% of plants) | Low (under 5%) |
| Yield increase (average) | Baseline | +20–35% by weight |
| Fertilizer waste | 30–50% runoff | Less than 10% runoff |
| Monthly water cost (UK, £0.03/L) | £13.50–£18 | £7–£9 |
Data based on average UK water rates and typical greenhouse trials. Savings may vary by local climate and crop selection. Automating ventilation further optimizes humidity—compare options in Palram Canopia Harmony 6×8: Automatic Roof Vent Opener vs Manual Windows – Which Is Better?.
What Owners Say About Automated Watering in the Harmony 6×8
Greenhouse owners frequently highlight how drip irrigation transforms their experience. Sarah M., from Kent, UK, shares: “I set up a simple timer and ¼-inch lines on my Harmony 6×8. My tomatoes doubled in size compared to last year, and I only refill the reservoir every three days. The best £90 I spent.”
David R., from Oregon, USA, notes: “I was sceptical about the upfront cost, but the 50% water savings paid for the kit in six months. My lettuce stays crisp, and I never worry about overwatering on hot days.”
Another grower, Elena T., from the Netherlands, adds: “The drip system is brilliant for germination. I use a separate zone for seedlings—they get mist-like droplets for 10 minutes twice daily. No more damping off.”
Common praise includes the system’s compatibility with the Harmony 6×8’s raised beds and its ability to maintain soil moisture even when owners are away for long weekends. Some mention that placing the timer near the greenhouse door makes programming easy, even in winter. For more setup guidance, see Palram Canopia Harmony 6×8: Ground Preparation Tips for a Stable Foundation.
Frequently Asked Questions
Q1: Can I use rainwater with the drip system?
Yes, but always install a filter (150-mesh minimum) to catch debris from barrels. Rainwater is naturally soft and reduces mineral buildup in emitters.
Q2: How long should I run the drip irrigation per cycle?
For vegetables in a 6×8, run cycles of 15–30 minutes in summer and 5–10 minutes in cooler weather. Check soil moisture an inch deep; adjust until it’s consistently damp but not saturated.
Q3: Will the system freeze in winter?
Drain all lines before frost or insulate with foam covers. The Harmony 6×8 provides some frost buffering, but exposed tubing above ground is vulnerable. Use a freeze-resistant timer if you leave it in place.
Q4: Can I expand the system later?
Absolutely. The modular design lets you add extra drip lines, and most controllers support up to four zones. Just punch new holes in the mainline and add tubing as you expand your growing area.
Q5: How often should I clean the filter and lines?
Clean the filter monthly during active growing seasons. Flush the lines with water using the flush cap every 6–8 weeks to prevent algae or sediment clogs. In hard water areas, use a mild vinegar rinse.
Q6: Is drip irrigation better than a soaker hose?
For greenhouse rows, drip irrigation is superior because it delivers water directly to the root area without wetting paths. Soaker hoses can be uneven and waste water on non-plant areas. Drip consumes 30–40% less water over the same area.