Introduction
The Suncast 8×6 Tremont greenhouse is a popular resin-based structure designed for hobbyists who want a low-maintenance growing space. One of its standout features is the automatic ventilation system, which can be upgraded for improved temperature control. This article covers the installation process, performance review, and practical tips for keeping your greenhouse cool during the summer months. Whether you are a first-time owner or a seasoned gardener, understanding how to optimize ventilation will help your plants thrive.
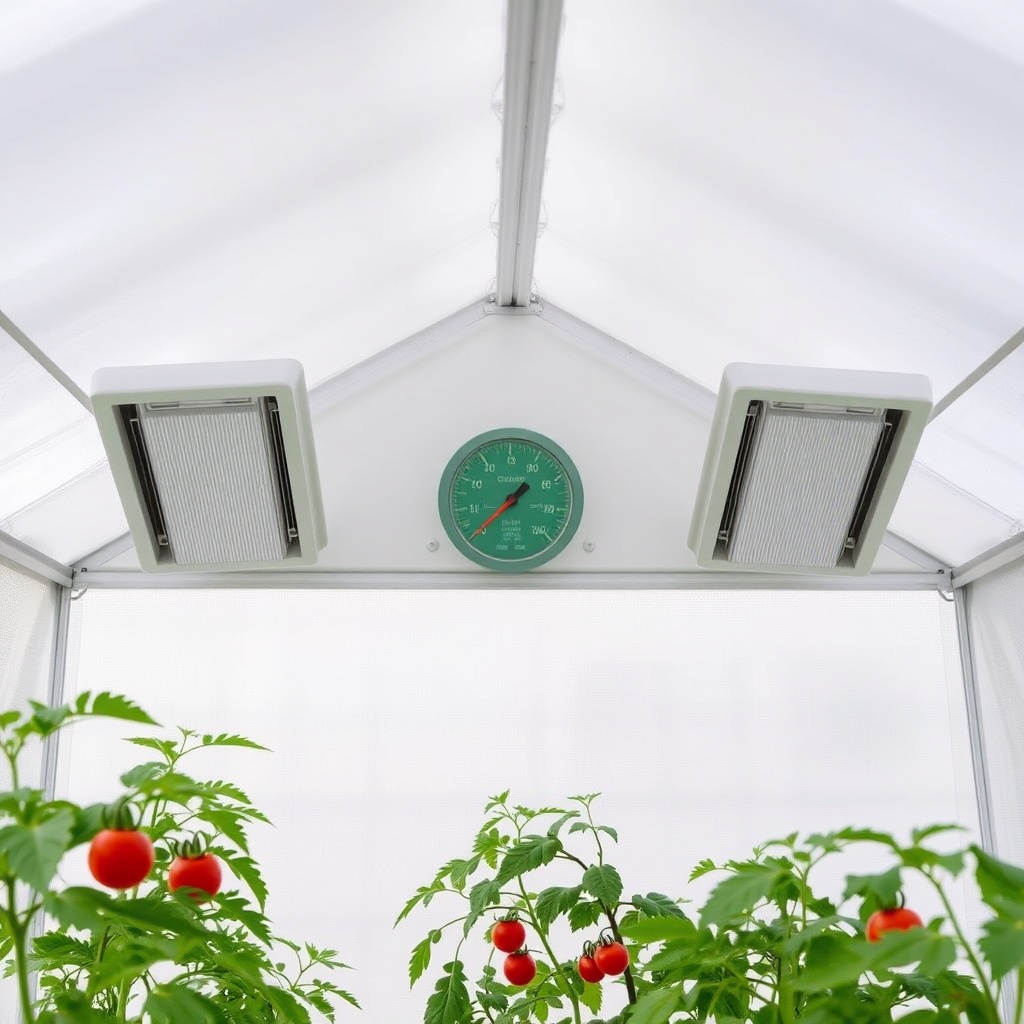
How Does the Automatic Ventilation System Work on the Suncast 8×6 Tremont?
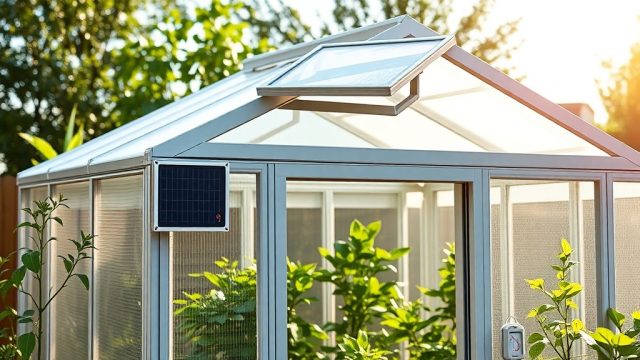
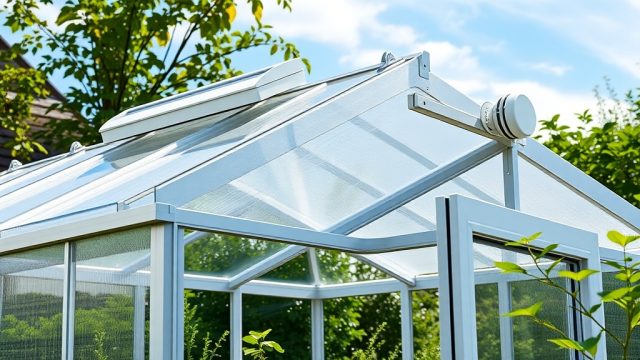
The Suncast 8×6 Tremont comes with a single roof vent as standard, but the automatic vent opener is an optional accessory. The system uses a wax-based piston mechanism that expands when the interior temperature rises above approximately 22–25°C (72–77°F). This expansion pushes the vent open, allowing hot air to escape. As the temperature drops, the piston contracts, closing the vent automatically. No electricity or batteries are required, making it an energy-efficient solution for cooling.
For the 8×6 model, the vent opener is typically mounted on the roof panel near the ridge. The unit can lift up to 7 kg (15 lbs) and provides a maximum opening of about 12–15 cm (4.7–5.9 inches). This is sufficient for passive airflow in a greenhouse of this size. However, many owners find that adding a second vent or a louvered side window significantly improves cross-ventilation, especially during peak summer heat.

What Tools and Materials Are Needed for Installation?
Installing the automatic vent system on the Suncast 8×6 Tremont is a straightforward DIY project. You will need the following tools and materials:
- Automatic vent opener kit (compatible with Suncast Tremont models, typically priced at £30–£45)
- Adjustable spanner or socket set (10 mm and 13 mm sockets)
- Drill with a 5 mm drill bit (for pilot holes in the resin frame)
- Screwdriver (Phillips head)
- Measuring tape
- Pencil or marker
- Safety glasses
- Optional: silicone sealant for extra weatherproofing
The kit usually includes the piston cylinder, mounting brackets, screws, and a lock nut. Some aftermarket kits also include a rain sensor, though this is not standard. Ensure you purchase a kit explicitly designed for polycarbonate or resin greenhouses, as metal mounting brackets may require gaskets to avoid cracking the panels.
Step-by-Step Installation Process
Follow these steps for a smooth installation. Always refer to your specific vent opener manual, as designs may vary slightly.
- Prepare the vent: Open the roof vent fully and remove any shipping tape or plastic covers. Clean the area around the vent frame with a damp cloth to ensure a good seal.
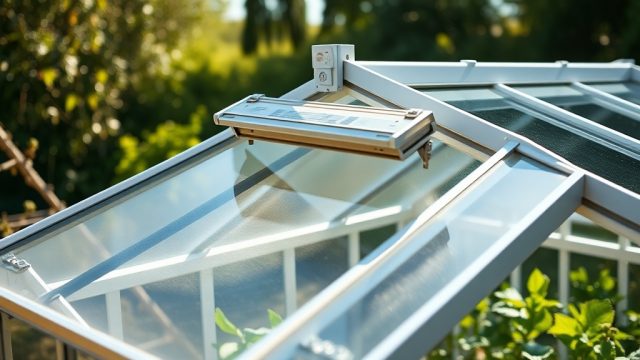
- Mark the mounting points: Hold the bottom bracket (fixed to the vent frame) against the resin surface. Use a pencil to mark the screw holes. Do the same for the top bracket (attached to the roof panel). Ensure the piston is centered and aligned vertically.
- Drill pilot holes: Using a 5 mm drill bit, carefully drill through the marked points. Go slowly to avoid chipping the resin. If you are nervous, place a piece of masking tape over the spot first to reduce splintering.
- Attach the bottom bracket: Secure the bracket to the vent frame using the provided screws. Tighten firmly but do not overtighten—resin can crack under excessive force.
- Mount the piston: Slide the piston cylinder onto the bottom bracket pin. Then attach the top bracket to the roof panel, connecting the piston rod. Adjust the rod length if necessary (most kits allow a 2–3 cm adjustment).
- Test the operation: Manually lift the vent slightly to ensure the piston moves smoothly. Set the opening temperature (if your kit has an adjuster screw) to your desired threshold—typically 22°C is recommended for most crops.
- Final check: Lock the vent in closed position and inspect all screws. Apply a small bead of silicone sealant around screw heads if you want extra protection against water ingress.
Total installation time is about 30–45 minutes for a single vent. If you add a second vent on the opposite side of the roof, repeat the process. Many owners at Suncast 8×6 Tremont Maintenance: Cleaning and Care for Resin Panels recommend pairing the automatic opener with a manual louver on the side wall for maximum airflow.
How Does the Ventilation Performance Compare to Other Cooling Methods?
To give you a clear picture of how the automatic system stacks up against other cooling options for the Suncast 8×6 Tremont, here is a comparison table based on average greenhouse temperatures in a UK summer (ambient 25°C).
| Cooling Method | Interior Temperature Drop | Cost (Approx.) | Energy Use | Maintenance |
|---|---|---|---|---|
| Automatic roof vent (single) | 5–8°C | £35 (kit only) | None | Annual lubrication |
| Automatic roof vent (dual) | 8–12°C | £70 | None | Annual lubrication |
| Solar-powered fan (10W) | 6–10°C | £60–£100 | Solar (free) | Clean fan blades quarterly |
| Shade cloth (50%) | 4–6°C | £15–£25 | None | Remove in autumn |
| Misting system (low-pressure) | 10–15°C | £80–£150 | Water pump (mains) | Clean nozzles monthly |
The automatic vent system offers a good balance of cost, simplicity, and effectiveness. While a misting system provides greater cooling, it requires a water supply and regular maintenance. For most hobby growers, the dual vent setup is the sweet spot. If you are considering Suncast 8×6 Tremont Heating: Best Ways to Keep It Warm in Winter, note that the same vent can also be used for passive winter ventilation on mild days.
What Owners Say About the Ventilation System
Feedback from Suncast 8×6 Tremont owners is generally positive regarding the automatic vent opener. Many appreciate the hands-off operation—once installed, it requires no daily attention. A common theme in online forums is that the single vent is adequate for spring and autumn but insufficient during heatwaves. Owners in southern England and similar climates often add a second vent or a side louver after their first summer.
One owner from Cornwall noted: “The kit is easy to install. I had it up in 30 minutes. It keeps the temp around 28°C on a 30°C day, which is fine for my tomatoes and peppers. I just wish I’d bought the dual kit from the start.” Another user in Scotland mentioned that the piston stuck once after a frost, but a drop of WD40 solved the issue. The resin frame of the Tremont series holds up well over time, as detailed in Suncast 8×6 Tremont Frame: Resin vs Metal – Which Offers Better Longevity?.
Concerns raised include the lack of a manual override on some models—if the piston fails, you cannot easily close the vent without removing it. Also, the plastic mounting brackets can feel flimsy compared to metal versions, though breakage is rare. Overall, owners rate the system 4 out of 5 stars for value and reliability.
Frequently Asked Questions
1. Can I install the automatic vent on the Suncast 8×6 Tremont if I have double glazing?
Yes, the vent opener attaches to the frame, not the panel. The polycarbonate panels are 4 mm thick and can support the brackets without issue. Refer to Suncast 8×6 Tremont Glazing: How Durable Are the Polycarbonate Panels? for more on panel durability.
2. What temperature does the vent open at?
Most factory-set openers activate at around 22–25°C (72–77°F). Some models have an adjustment screw that lets you change the threshold by ±3°C.
3. Will the vent close automatically if it rains?
Standard vent openers do not have rain sensors—they close only when the temperature drops. If rain comes with warm air, the vent may stay open. To prevent this, you can buy a rain-sensor add-on or a hybrid vent opener with a hydraulic delay.
4. How do I maintain the vent opener?
Apply a silicone-based lubricant to the piston rod once a year, preferably in spring. Clean the vent seal with mild soap and water. Ensure no debris blocks the vent’s travel path.
5. Can I use the vent in winter?
Yes, but do not rely on it for active ventilation in sub-zero temperatures. The piston may become sluggish when the wax is cold. On sunny winter days, it will still open slightly, which can help reduce humidity inside the greenhouse.
6. Is the kit compatible with other Suncast greenhouse models?
The 8×6 Tremont uses a specific bracket size. Most kits designed for resin greenhouses with a 60 cm (24-inch) roof vent will fit. Check your vent dimensions before purchase, or buy directly from Suncast to guarantee compatibility.